Silk Tie Dyeing Made Simple: Step‑by‑Step Guide
If you love bright fabrics but think silk is too tricky, think again. Tie dyeing silk can be done in your kitchen with just a few supplies. In this guide we’ll walk through everything you need – from choosing the right silk to locking in vivid colors.
What You Need Before You Start
First, grab a piece of natural‑silk fabric or an old silk scarf. Synthetic blends won’t take the dye as well. You’ll also need a tie‑dye kit that includes fiber‑reactive dyes (these work best on protein fibers like silk), rubber bands, a large plastic bucket, gloves, and a plastic squeeze bottle for applying dye.
Set up a workspace covered with newspaper or a plastic sheet. Silk is delicate, so keep the area well ventilated and wear gloves to avoid staining your hands.
Preparing the Silk
Give the silk a quick rinse in warm water with a splash of mild detergent. This removes any sizing that could block the dye. Rinse again until the water runs clear, then gently wring out excess moisture – you want it damp but not soaking.
Now comes the fun part: tying. Fold, twist, or pleat the fabric into your favorite shape and secure with rubber bands. Classic patterns include spirals, stripes, and bullseyes. The tighter you bind, the sharper the lines when the dye spreads.Once tied, it’s time to apply color. Mix each dye according to the package instructions – usually a few teaspoons of powder in warm water. Fill the squeeze bottle, then press the dye onto the fabric. Apply several colors if you want a rainbow effect, but work from lightest to darkest to avoid muddy shades.
After you’ve covered every section, place the dyed silk back into the bucket and add enough warm water to fully submerge it. Let it soak for 30‑45 minutes, stirring gently once or twice. This gives the dye time to bond with the fibers.
Setting the Color and Finishing Up
When soaking is done, rinse the silk in cool water until the runoff is clear. Then prepare a fixative – a mixture of 1 part white vinegar to 3 parts water works well for silk. Soak the fabric briefly, then hang it to dry away from direct sunlight.
Once dry, remove the rubber bands and gently pull apart the folds. You’ll see crisp patterns and vibrant colors that stay bright after washing. To keep them looking fresh, hand wash in cold water with a mild soap and air‑dry.
That’s it! With these steps you can turn plain silk into eye‑catching art without spending a fortune on studio space.
Quick Tips & Common Mistakes
- Don’t use bleach: It weakens silk fibers and ruins the dye.
- Test a scrap first: Different silks react slightly differently to dyes.
- Keep the fabric damp: Dry silk won’t absorb dye evenly.
- Don’t over‑twist: Too tight a bind can cause holes when you remove bands.
Now you have everything to start your own silk tie‑dye projects. Experiment with new patterns, blend colors, and share your creations – the possibilities are endless!
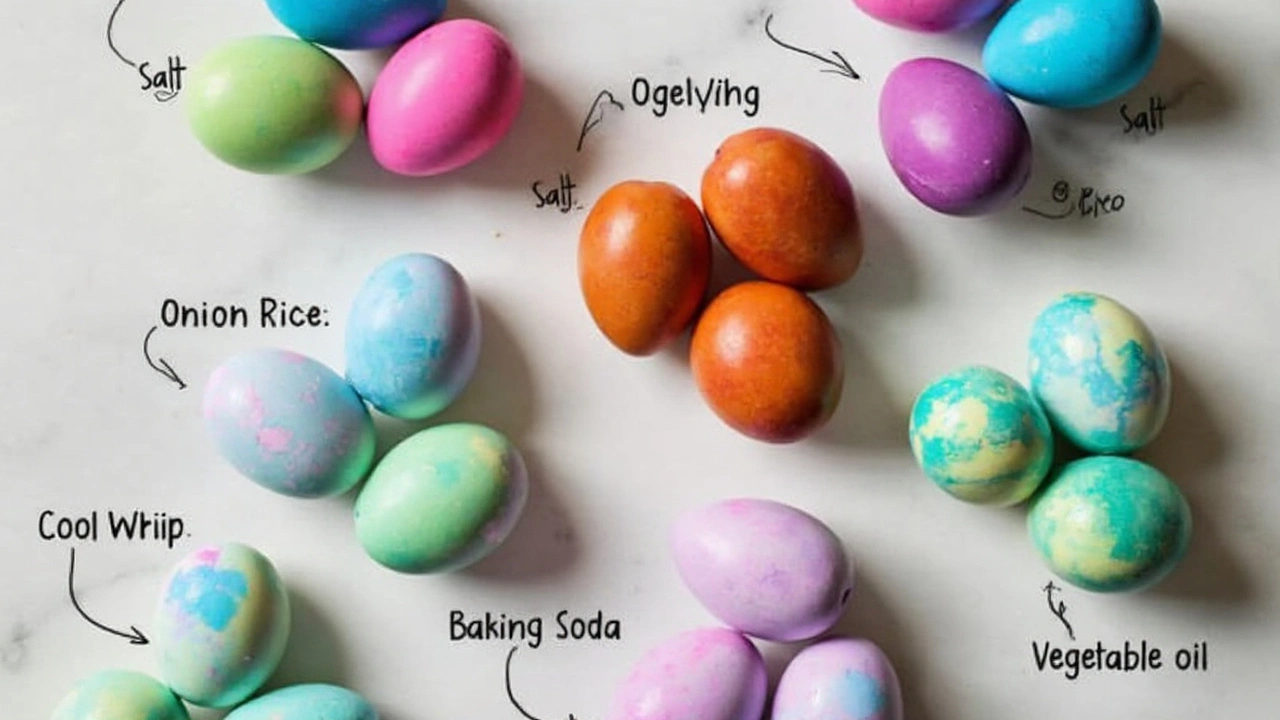
Exploring seven innovative ways to dye Easter eggs, this article highlights the effectiveness of various methods and reveals three standout tricks for enhanced color and pattern results. By comparing natural and unconventional approaches, lessons were found in using vinegar for better color absorption, applying heat to speed up dye processes, and combining techniques for multidimensional designs.